DocsRecording
Recording Modes: Quick vs Studio
Two Ways To Record
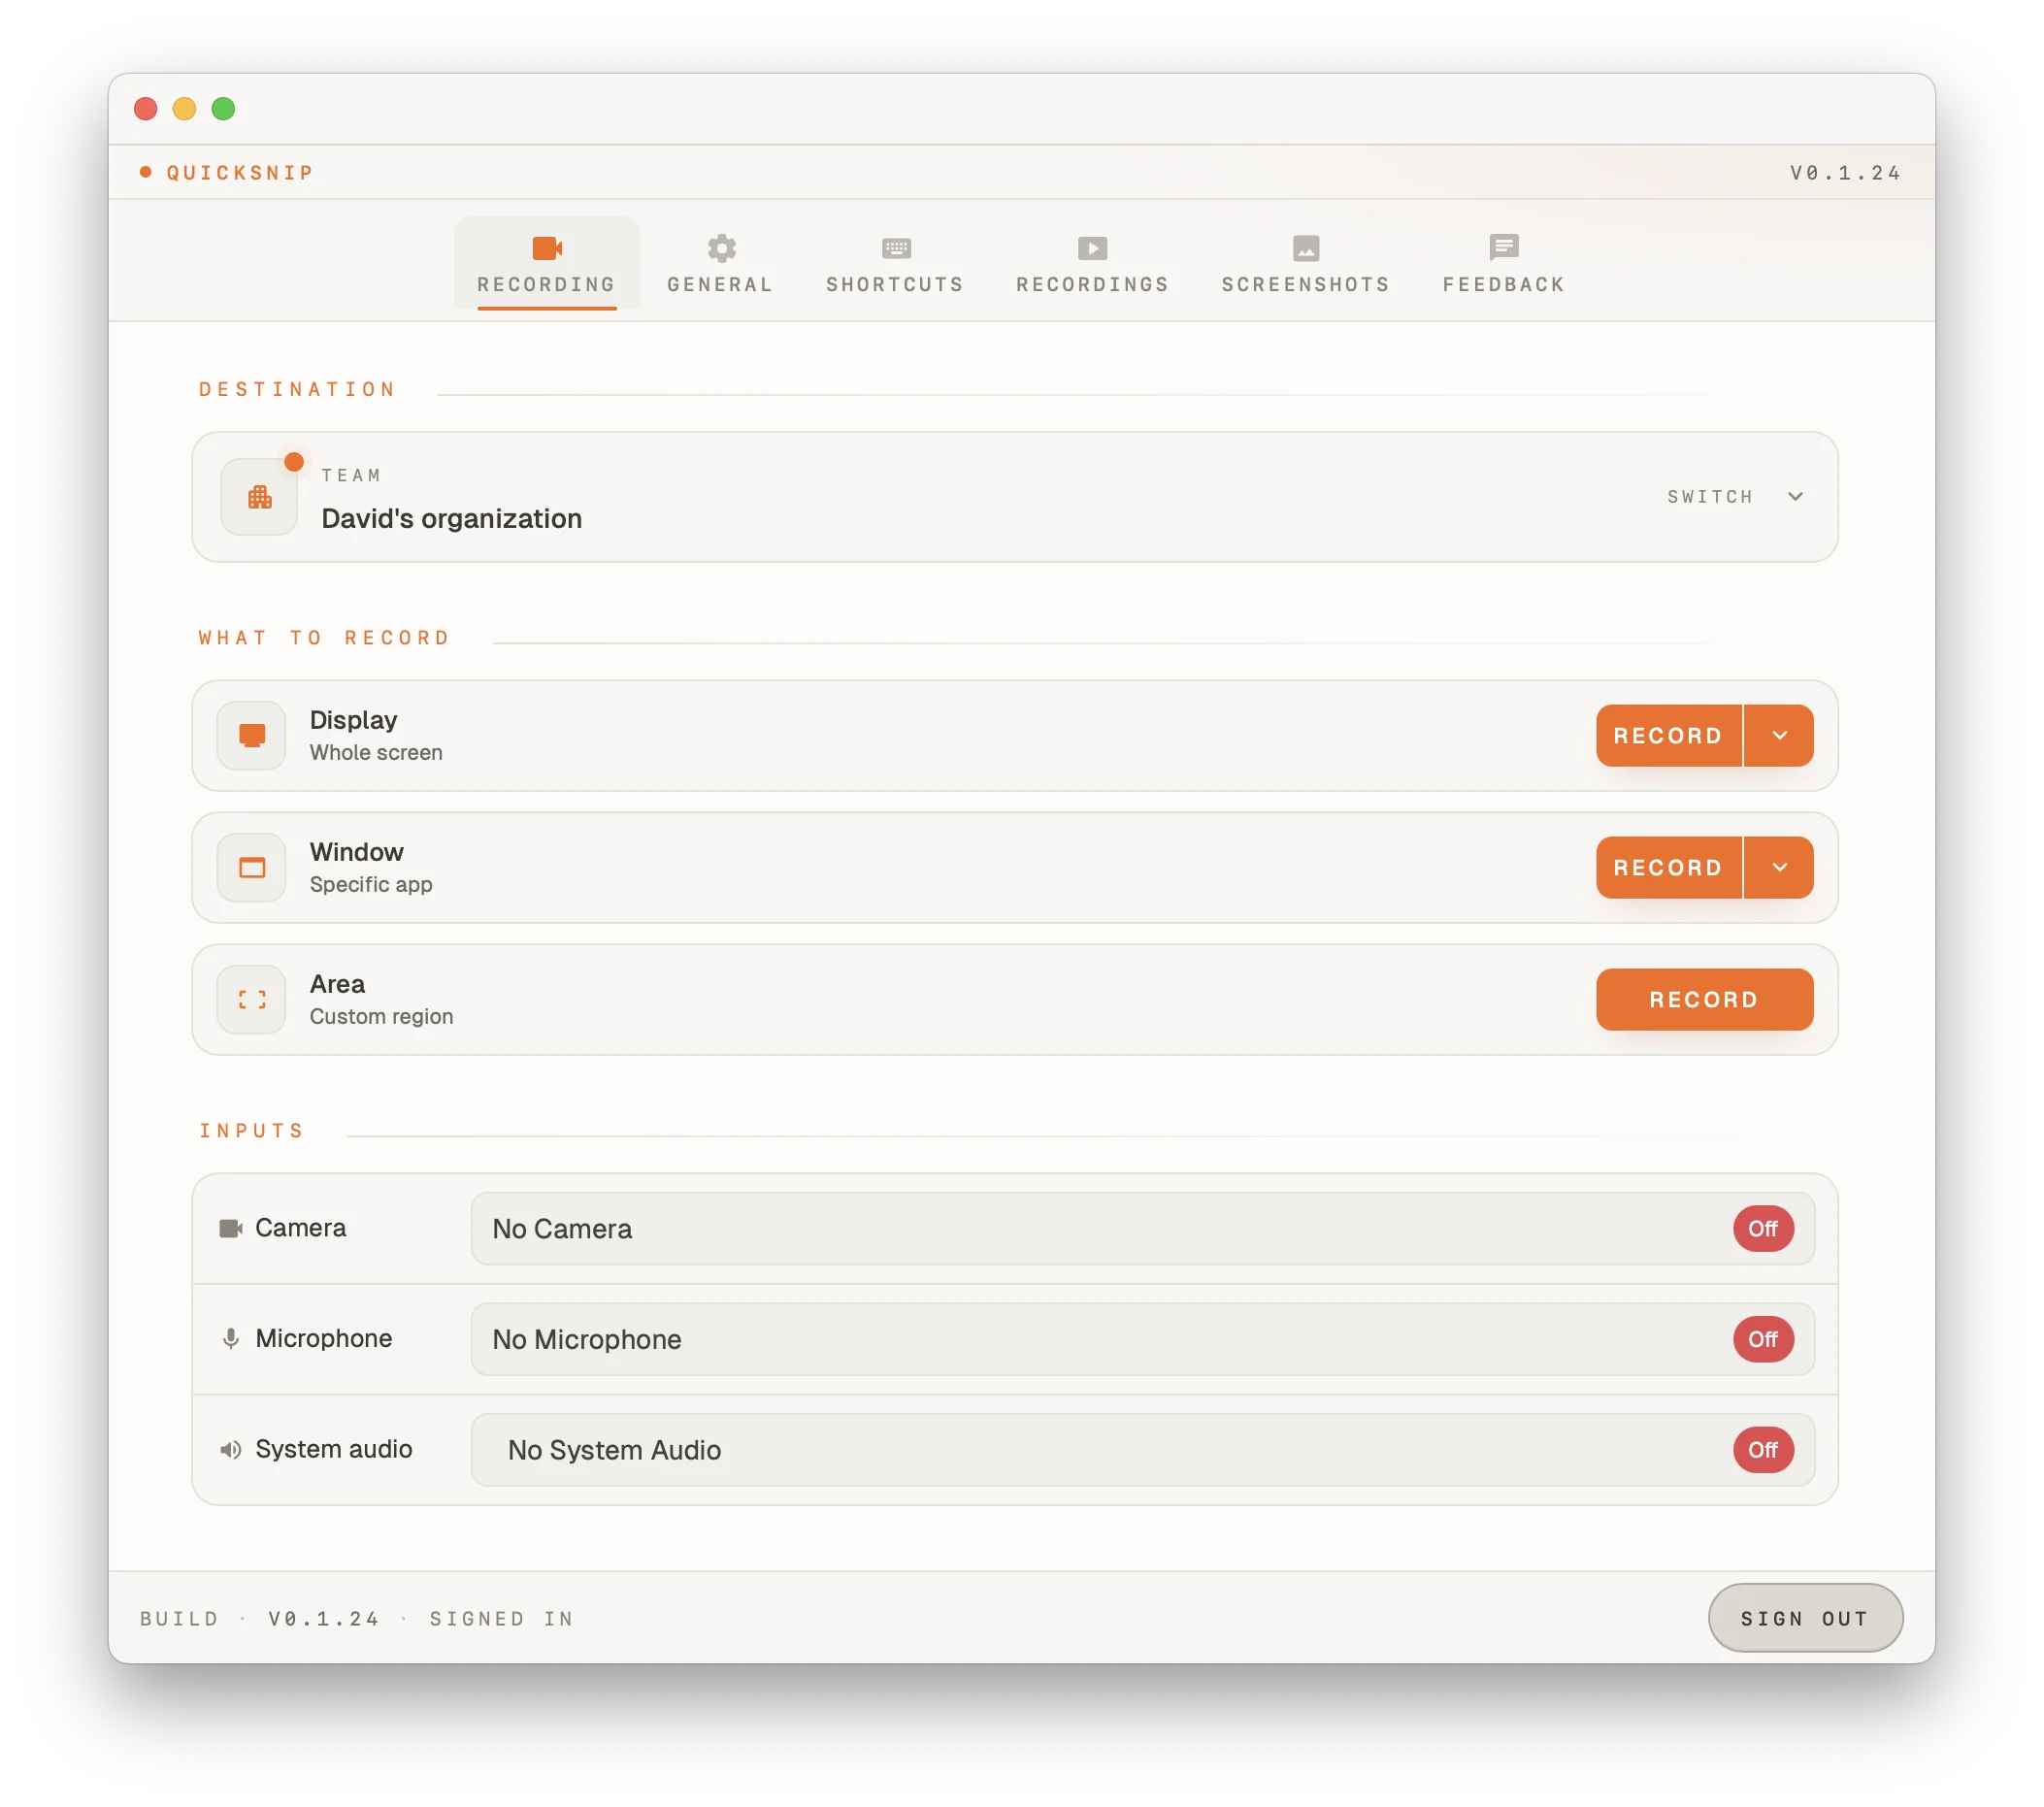
QuickSnip offers two recording modes, each designed for different workflows:
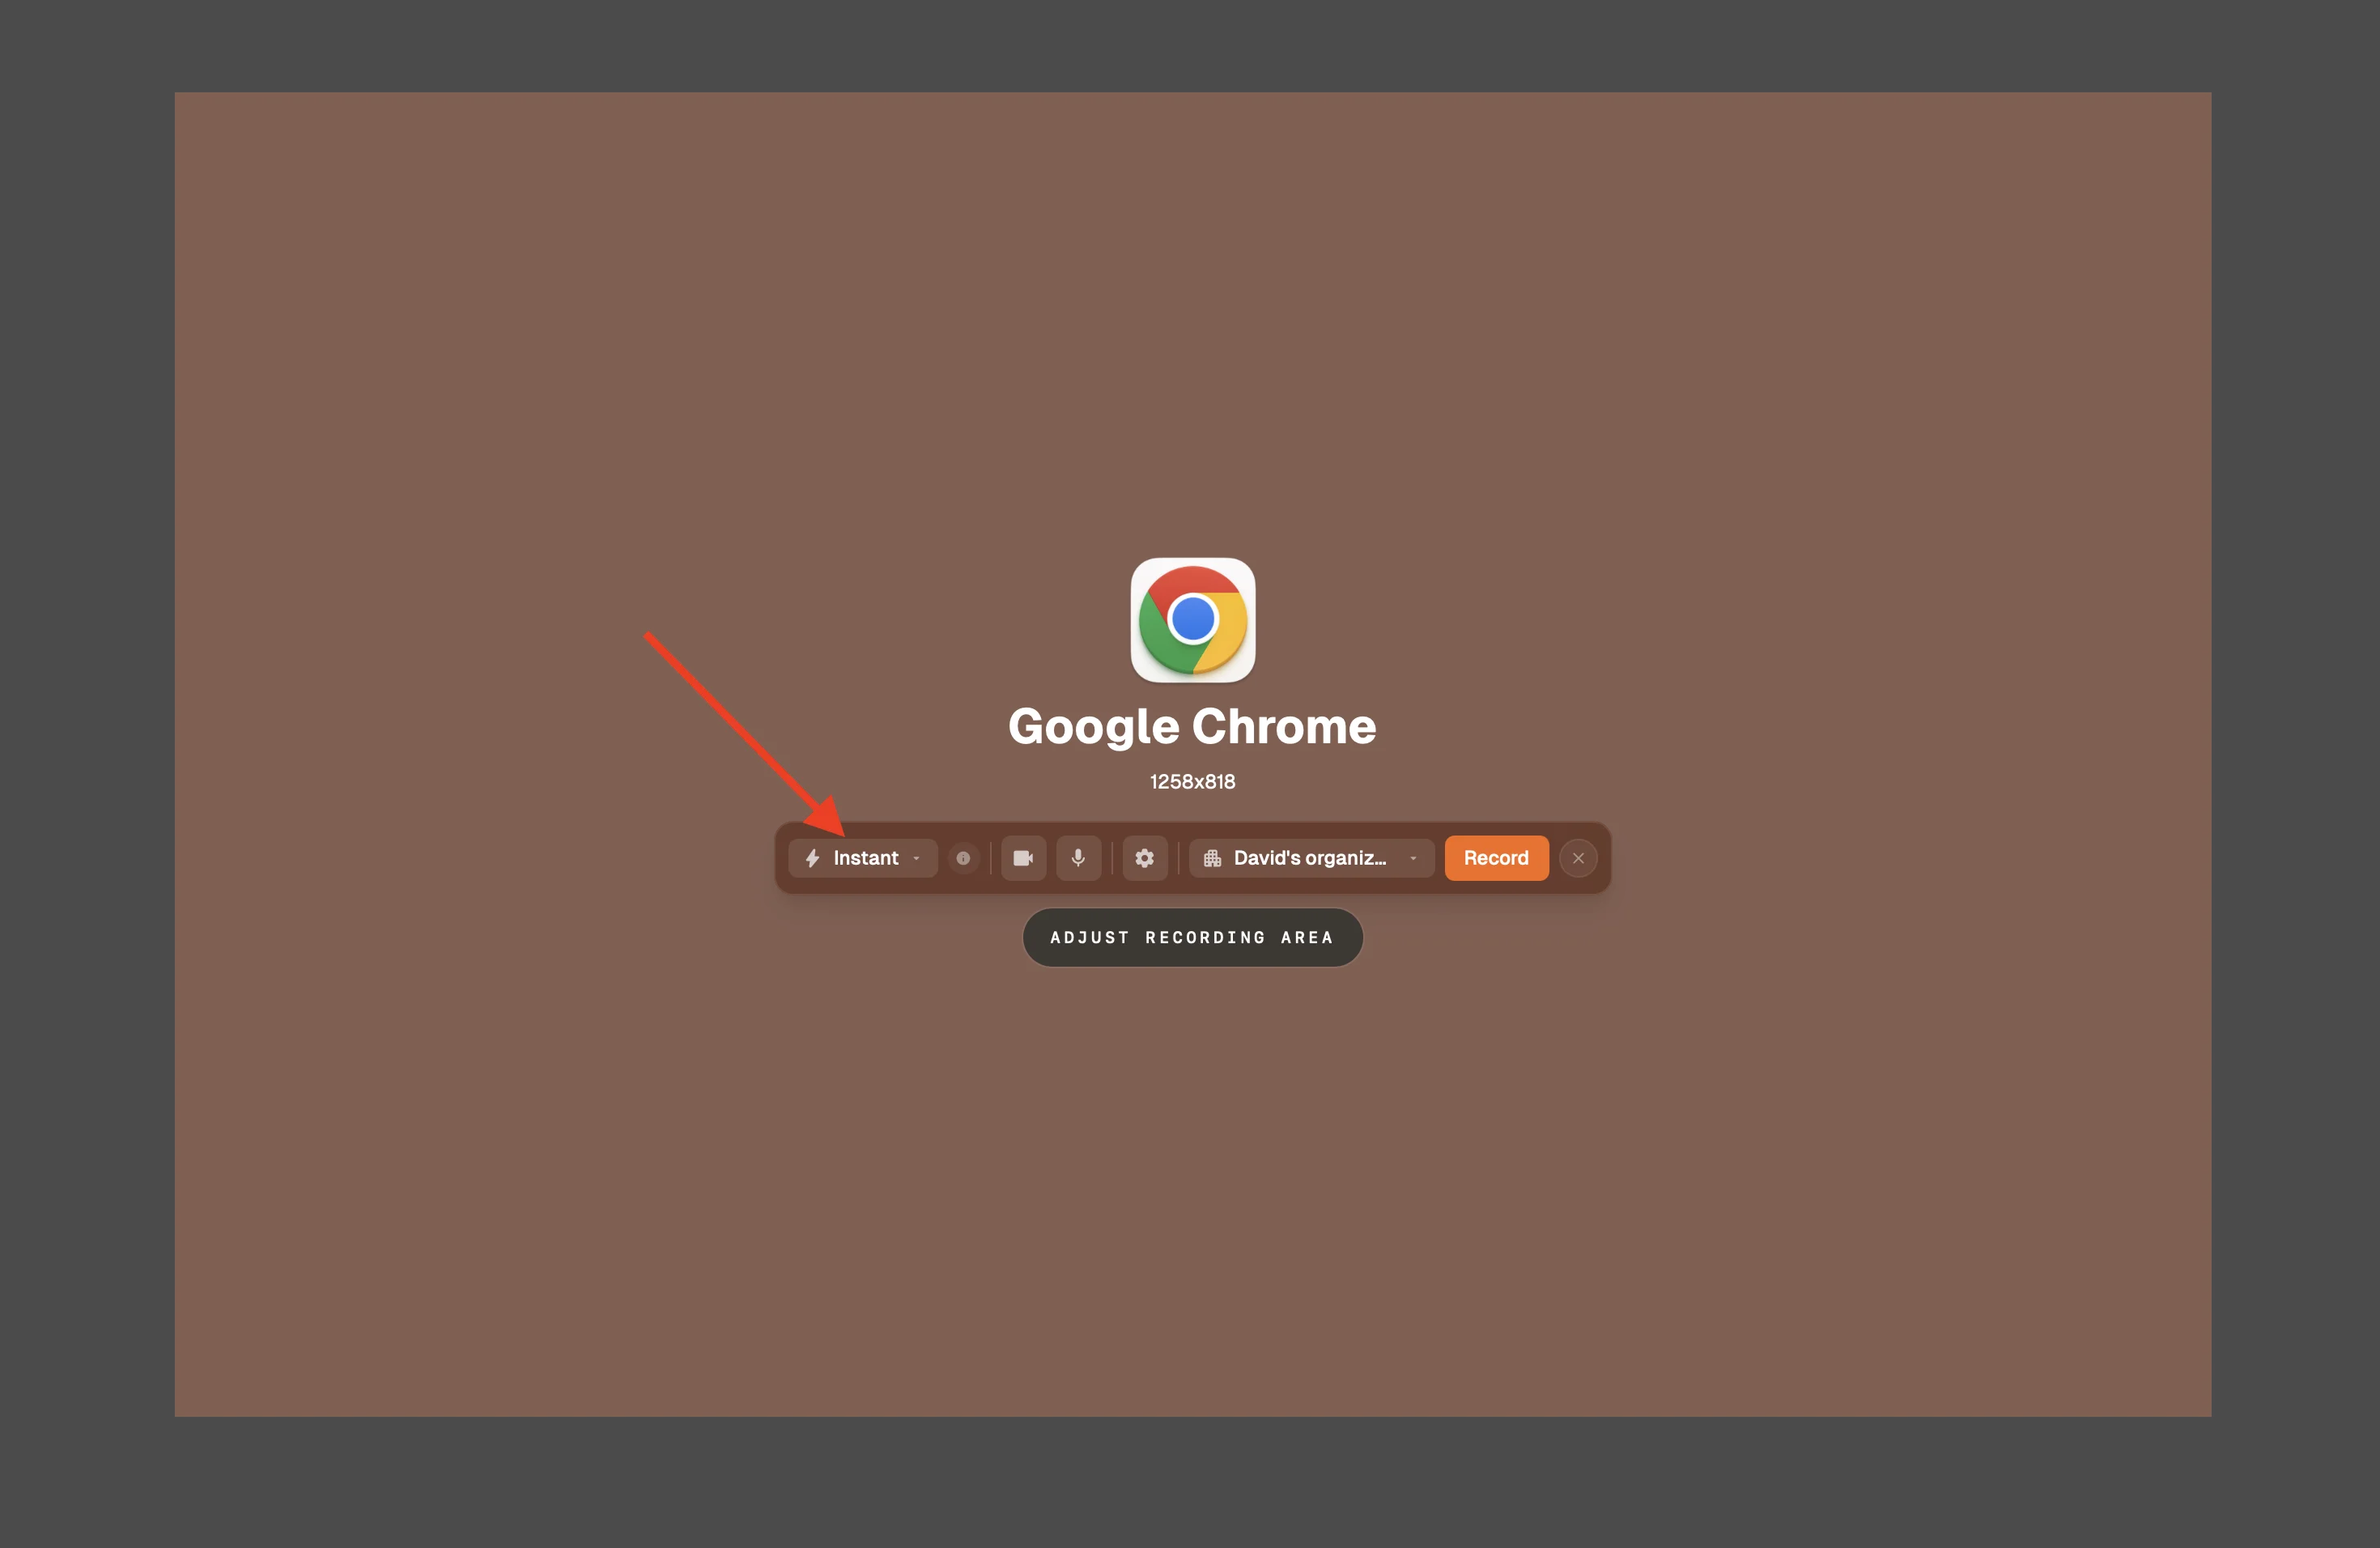
- Quick Mode — Record and share immediately. Best for quick messages, bug reports, and async updates.
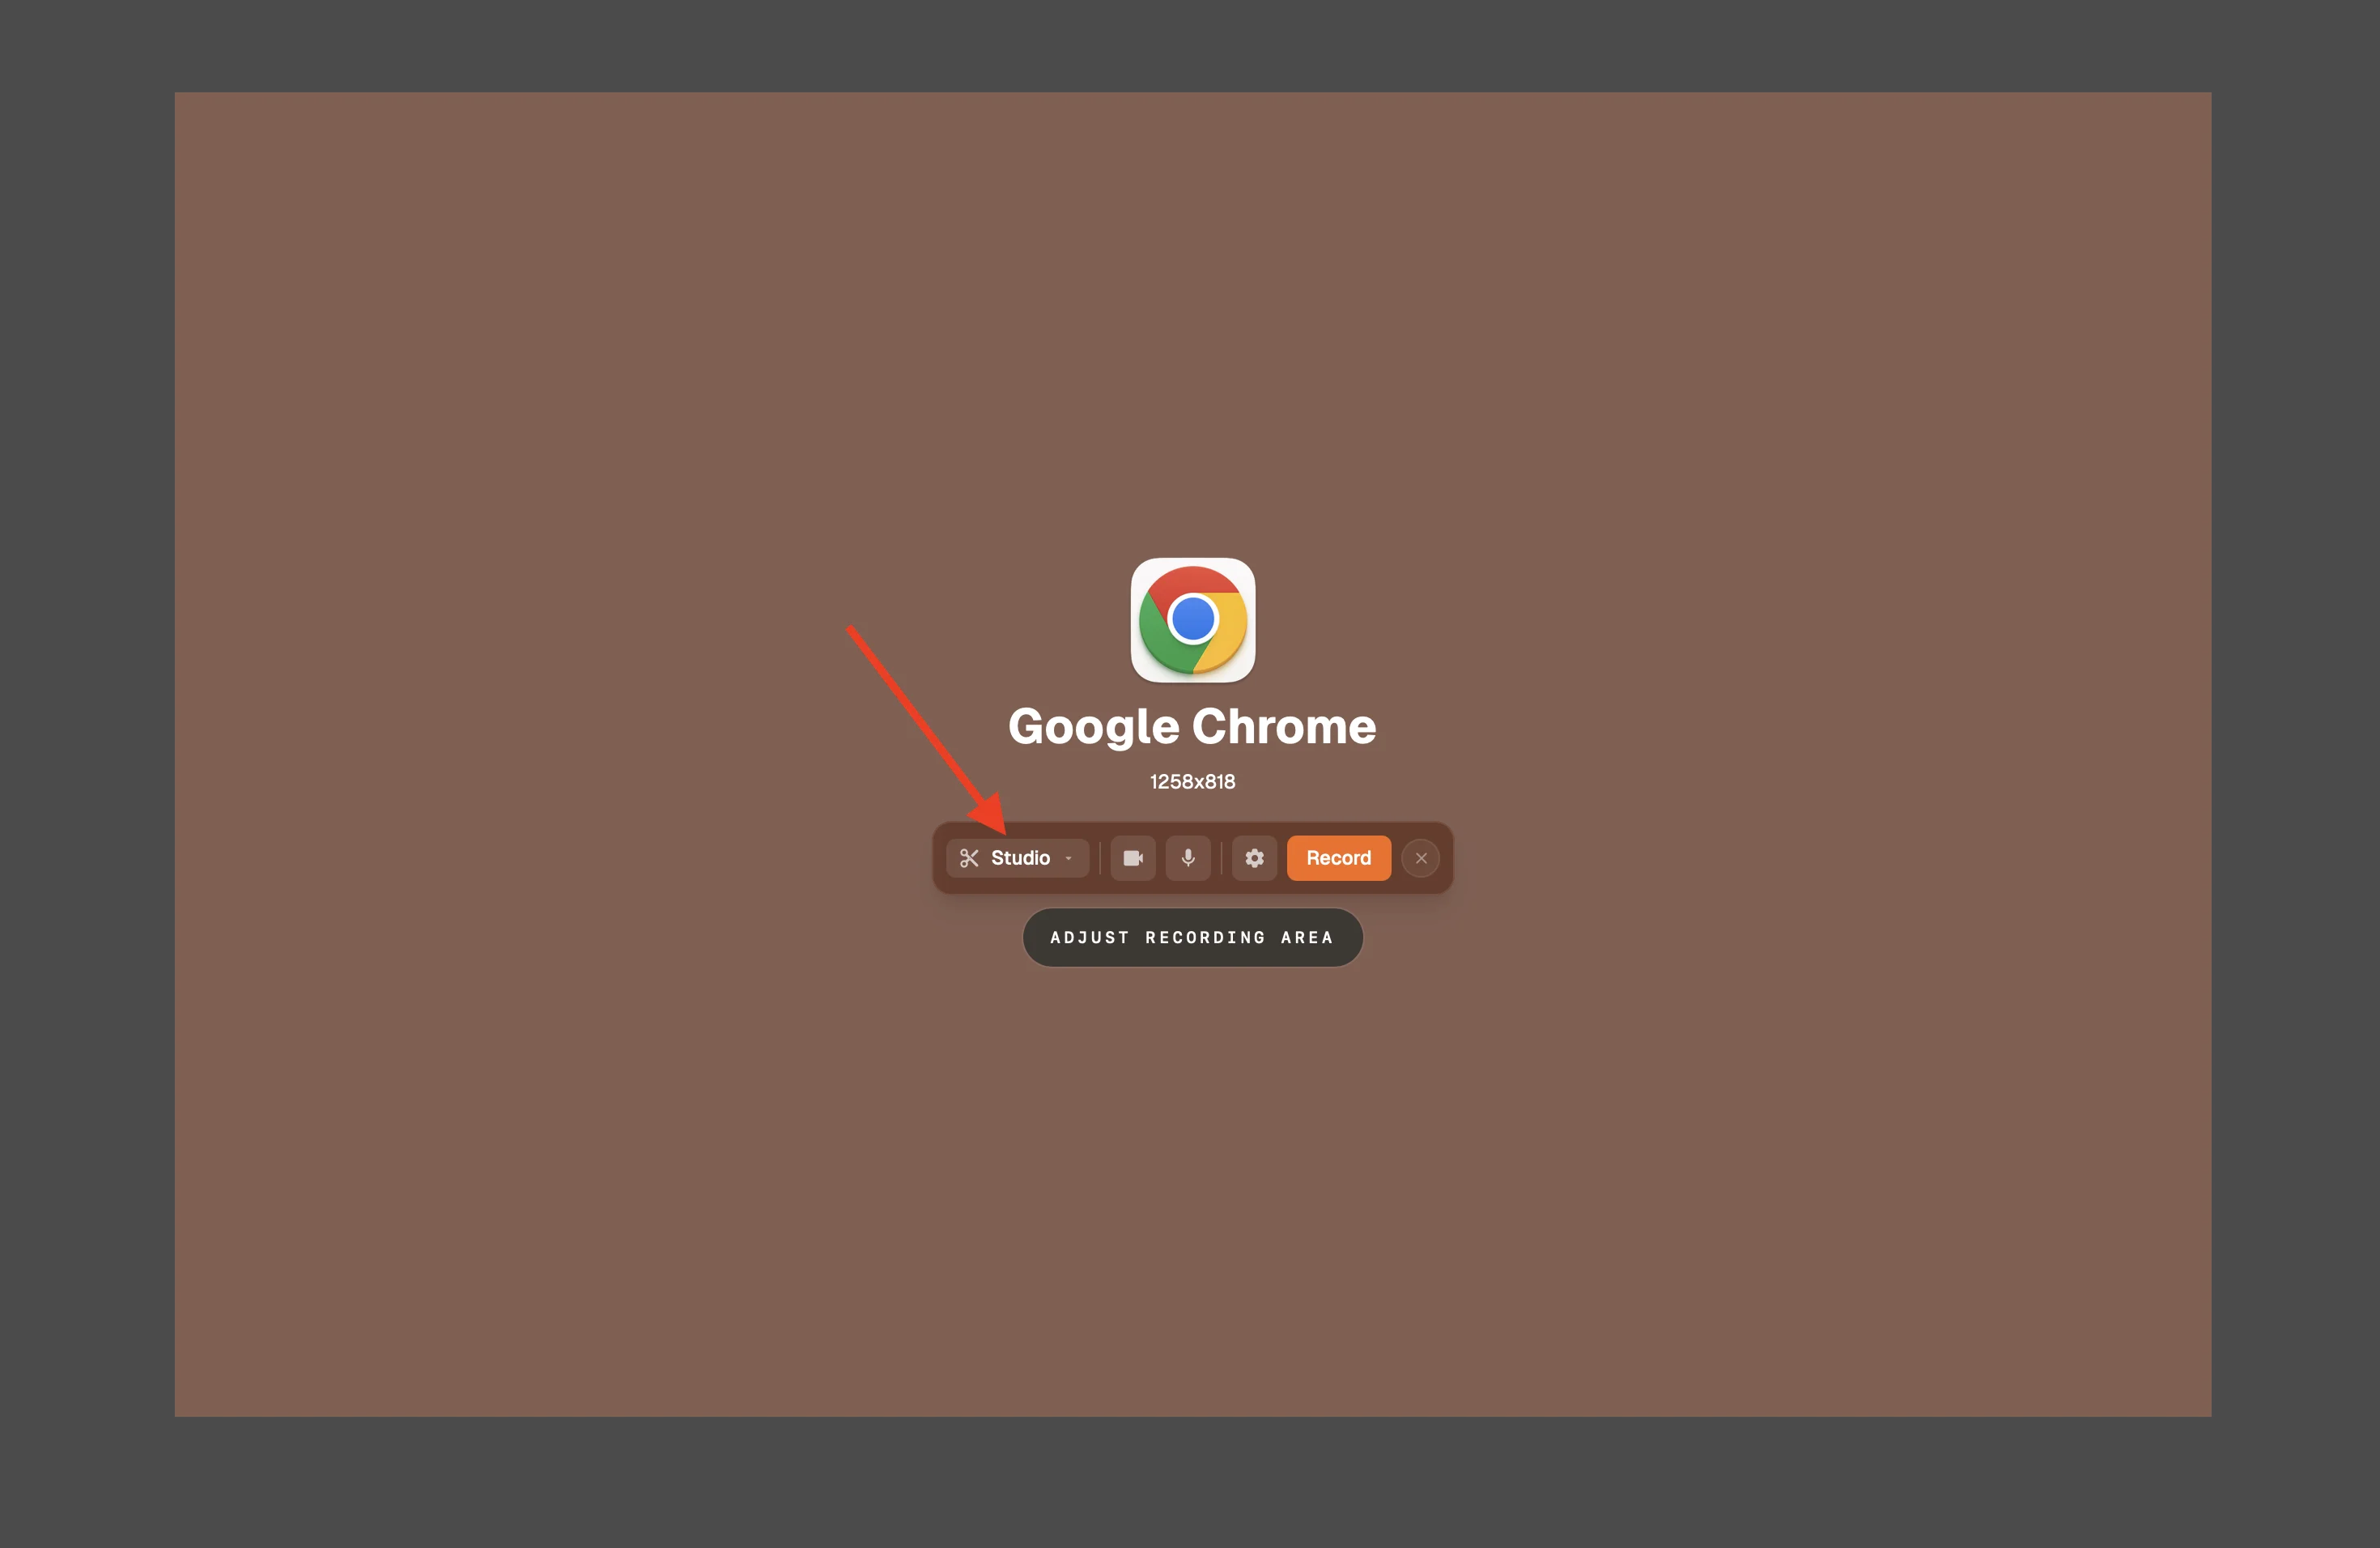
- Studio Mode — Record, then edit before sharing. Best for tutorials, demos, and polished content.
Quick Mode
Quick mode is the fastest path from recording to sharing. When you stop recording:
- Your video uploads automatically
- The share page opens in your browser
- The share link copies to your clipboard
- You can paste and send it immediately
No editing step, no waiting. This is ideal for everyday screen shares.
Best for:
- Quick bug reports
- Async standup updates
- Answering a colleague's question
- Sharing a design or feature
Studio Mode
Studio mode adds an editing step between recording and sharing. When you stop recording:
- The studio editor opens with your footage
- You can trim, cut, and adjust your recording
- When ready, export and share
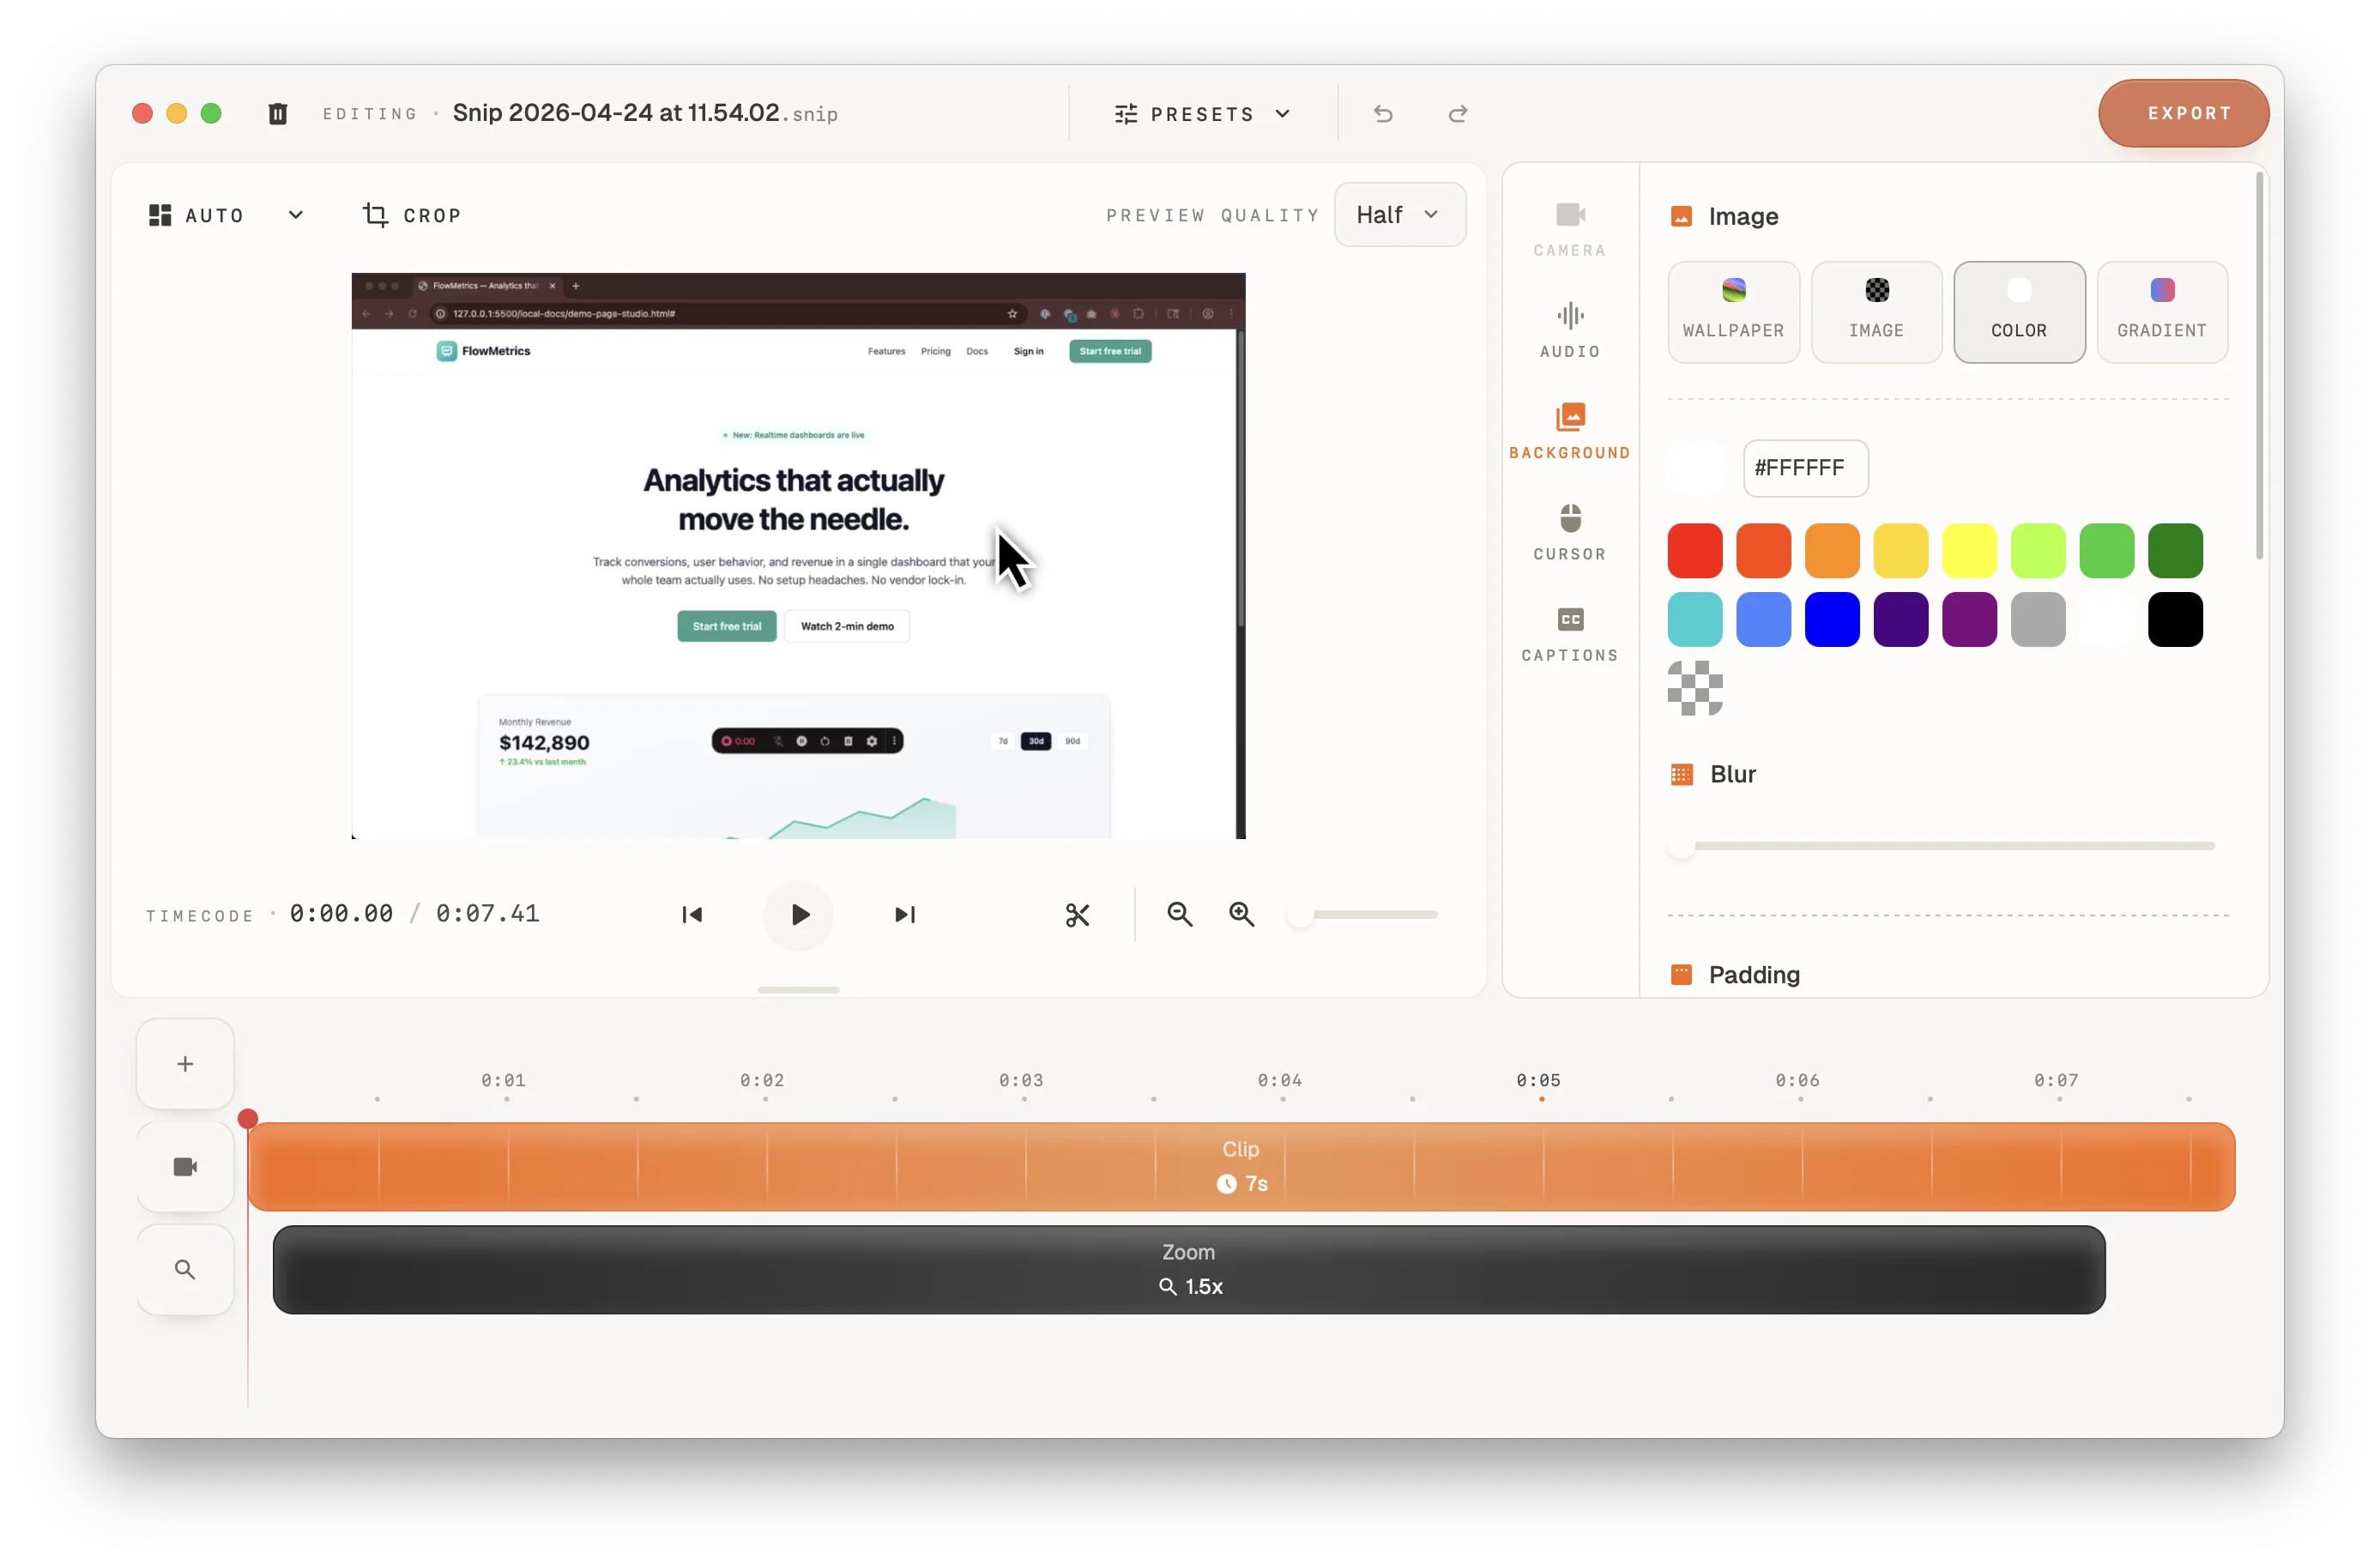
The studio editor gives you tools to:
- Trim the start and end of your recording
- Add AI captions with customizable styles
- Adjust background and padding
- Export in your preferred quality
Best for:
- Product demos and walkthroughs
- Tutorial videos
- Content that needs polish before sharing
- Recordings with sensitive content to trim out
Switching Between Modes
You can switch modes at any time from the recording panel. Your preference is saved between sessions.
What's Next
- Audio Settings — Configure microphone and system audio
- AI Captions — Add captions in Studio mode
- Your First Recording — Quick start guide
Can’t Find What You Need?
Reach out to our support team and we’ll get back to you within 24 hours.